Ok, my time left in the afternoon was hindered by poor planning and prep work. So I decided not to spray the primer just yet. Instead, I had to wash and dry with thinners and wax and grease remover the pockets where the bonnet hinges dock, to paint them with POR15.
I did this, and used a brush to paint it on. However, I'll use a spray gun tomorrow for a second coat. I realised that the fish oil I had used in the chassis rails before i started stripping had caused the sand from the sand blaster to stick to it. SO, before i could paint the inside of the water tray. I need to pressure wash that out.
So tomorrow morning i'll hit that with a combination of hot water and anything else I can think of to remove it that way i can spray on the final coats of POR15 and inside the water tray too. At the same time, wash the acid from the rust converter off the rest of the engine bay for primer. Then apparently Its best to wash it with metho. Then air dry it and then... Finally I can paint the primer down. Which has its own Zinc rust inhibitor in it.
Epoxy primer.
Anyway, this was all I did today.
Attachment:
File comment: After washing down the inside of the pockets and removing the fish oil. POR15 was painted on the inside to coat the hinge pockets. Will spray it on tomorrow.
![[ attachment ]](./download/file.php?id=15732&t=1&sid=fdd73d7b748b6b6e4fd5c1f337791a5e)
DSC04321.jpg [ 170.07 KiB | Viewed 2161 times ]
Oh, and Spandex's door handles are finished now too. If you're still keen?
Attachment:
File comment: Polished Top side and rounded ends.
![[ attachment ]](./download/file.php?id=16406&t=1&sid=fdd73d7b748b6b6e4fd5c1f337791a5e)
DSC04496.jpg [ 108.9 KiB | Viewed 2117 times ]
Attachment:
File comment: Sides all polished.
![[ attachment ]](./download/file.php?id=15734&t=1&sid=fdd73d7b748b6b6e4fd5c1f337791a5e)
DSC04327.jpg [ 99.21 KiB | Viewed 2161 times ]
Attachment:
File comment: Bottom polished up also. But only a little. You won't see them.
![[ attachment ]](./download/file.php?id=15735&t=1&sid=fdd73d7b748b6b6e4fd5c1f337791a5e)
DSC04329.jpg [ 118.06 KiB | Viewed 2161 times ]
If anyone else would like a set, PM me and i'll see if we can work something out.
_________________
Ongoing Project: 1972 Datsun 510 S13 SR20Det.
http://ozdat.com/forum/viewtopic.php?f=33&t=17898
New Daily: D22 Navara (The new workhorse)
Retired 12/2016: MY98 Subaru Impreza RX
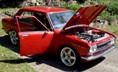
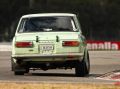
Previous Car: Restored Green 1972 Datsun 510, Hot L18