Ozdat Home Feature Cars Ozdat Classifieds Event Calander Links Trade Link Tech Resource Merchandise Donate Web Mail
It is currently Sat Apr 27, 2024 11:17 pm

All times are UTC+11:00


Post new topic  Reply to topic  [ 64 posts ]  Go to page « 1 2 3 4 5 »
Author Message
 Post subject: Re: sixtwenty daily
PostPosted: Sat May 22, 2010 8:35 pm 
Offline
User avatar

Joined: Fri Oct 13, 2006 4:06 pm
Posts: 314
Location: Western Suburbs, Victoriaaaaaaa
cab is off :D maaan i gossome work to do

3/6 cab mounts are proper busted, ill probs end up cutting out the only good cabin one and replace with what im doing to the others. sills are gone, theres bits under the cowl that are gone also, pretty massive rust hole underneath too but shouldnt be too hard to get in there. quite a few of the bolts that hold the quarters and front valance etc on are sheared so need to get some work into them :) theres a few holes in the floor, easy enough to fix, and a couple bits here and there that need fixing
doors need some holes welded up (or maybe i should get some wink mirrors :D), quarter window on the drivers side is bust but dan had a good spare so ill swap that in, new fresh dash needs to go in, i gotta make some kick panels, could do with some new carpet, and thats all i can remember at the mo, theres more

none of the above has me worried, i was prepared for this :D

[ img ]
[ img ]
[ img ]
[ img ]
[ img ]
[ img ]
[ img ]
[ img ]
[ img ]
[ img ]
[ img ]
[ img ]
[ img ]
[ img ]
[ img ]
[ img ]
[ img ]
[ img ]
[ img ]

ive modded my crane and a mates one so i can lift the cab evenly without assistance, cos both sides came to a pivot point i needed help lifting the cab so it stayed straight, but now with my hectic cranes it should rise evenly. so just about ready to get cutting into the cab for some rust repair
[ img ]

ive got my engine bits now, so that'll be back together soon, i picked up some 720 front disc hubs yesterday too, they look like they're gunna bolt right on, but US people need brackets or something, they might have kingpin fronts though, i dunno. maybe getting into that tomoz

all in all still going! all my parts and needs have come together today so plenty more i can get cracking on :D

_________________
1972 P510
1979 620


Top
   
 Post subject: Re: sixtwenty daily
PostPosted: Sun Jun 20, 2010 11:02 pm 
Offline
User avatar

Joined: Fri Oct 13, 2006 4:06 pm
Posts: 314
Location: Western Suburbs, Victoriaaaaaaa
fair bit of progress since, save this last week ive still been working on it every day. ive;

ive lifted the cab and got it onto a little dolly thing i made
[ img ]

swapped out front hubs for 720 discs
[ img ]

put the engine back together, practically ready to start
[ img ]

nearly finished an alternator swap, from factory 35A, to urvan 50A, now its an 80A SR20 alternator :)
[ img ]

swapped in good bits from old dash into new nice dash, sussed out places for headunit and some other stuff
[ img ]

made a glovebox, stock one was made of paper, sorta
[ img ]

got stuck into the cab, cut the drivers side sill out, chopped out lots of chunk and got some fresh steel in there, still a work in progress
[ img ]

cut out two cab mounts, working my way toward getting nice ones in there once more (will be sweet when cab lines up with tub once again)
[ img ]

made replacement sills, not perfect but look alright
[ img ]

got some new headlights, contemplating making the inners yellow, given my outers have park, beam and highbeam functions, making the inners kinda redundant. 4 full brightness highbeams would be a nice "**** you" for those prats with 500,000,000,000,000,000k HID's shoved in their factory baffled lenses though!
[ img ]

still moving along, lots of work to be done still but it'll get there

_________________
1972 P510
1979 620


Top
   
 Post subject: Re: sixtwenty daily
PostPosted: Mon Jun 21, 2010 7:57 pm 
Offline
Donating Member
Donating Member
User avatar

Joined: Wed Dec 05, 2007 2:21 pm
Posts: 3242
Location: Zermatt, Switzerland.
Wow, you're really going all out here! Inspirational work, keep it up :thumbsup:

_________________
green200b - aka Alistair

The fleet:

Australia:
'80 200B GX - the green200b - hibernating
'81 RX-7 - 12A extend port - daily
'74 RX-2 - 13B bridgeport - cruiser

Europe:
'93 200SX - CA18DET - tourer
Dato200B wrote:
Green200B has forgotten more about 200Bs than we will ever know.


Top
   
 Post subject: Re: sixtwenty daily
PostPosted: Mon Jun 21, 2010 10:09 pm 
Offline
User avatar

Joined: Thu Dec 03, 2009 1:20 am
Posts: 355
Location: Booyal, QLD (near Bundaberg)
Which beams go where on the old system? Do the low beams go to the outside or inside?

_________________
Sam-U-El/Racer135
1973 B110 - http://ozdat.com/forum/viewtopic.php?f=60&t=21539
1972 B110
1978 120Y sdn
1973 B120 - dead
1971 VB110 4dr - sold
Others:
1995 Proton Wira - daily sh#tbox

[ img ]


Top
   
 Post subject: Re: sixtwenty daily
PostPosted: Mon Jun 21, 2010 11:00 pm 
Offline
User avatar

Joined: Fri Oct 13, 2006 4:06 pm
Posts: 314
Location: Western Suburbs, Victoriaaaaaaa
thanks :D

just tryin to get it past mr RWC man, all out would probs include better bodywork which im not hectic enough to do myself :( its getting there though, ive got a pretty cool look in mind that i know ill like :D but might take some getting used to for most other people

the inners on mine are parkers, not very bright. the outers have low beam and high beam from factory :)

_________________
1972 P510
1979 620


Top
   
 Post subject: Re: sixtwenty daily
PostPosted: Mon Jun 21, 2010 11:20 pm 
Offline
User avatar

Joined: Thu Dec 03, 2009 1:20 am
Posts: 355
Location: Booyal, QLD (near Bundaberg)
What about in the 1600?

_________________
Sam-U-El/Racer135
1973 B110 - http://ozdat.com/forum/viewtopic.php?f=60&t=21539
1972 B110
1978 120Y sdn
1973 B120 - dead
1971 VB110 4dr - sold
Others:
1995 Proton Wira - daily sh#tbox

[ img ]


Top
   
 Post subject: Re: sixtwenty daily
PostPosted: Tue Jun 22, 2010 11:29 am 
Offline
User avatar

Joined: Fri Oct 13, 2006 4:06 pm
Posts: 314
Location: Western Suburbs, Victoriaaaaaaa
same deal i think, low and high beam outers, parker inners

510 isnt in my backyard at the mo, so i cant double check for you

_________________
1972 P510
1979 620


Top
   
 Post subject: Re: sixtwenty daily
PostPosted: Sat Jul 31, 2010 10:13 pm 
Offline
User avatar

Joined: Fri Oct 13, 2006 4:06 pm
Posts: 314
Location: Western Suburbs, Victoriaaaaaaa
not as much progress as id like to have done, but have had a couple hold ups here and there :( a funeral, working on my other cars, and mates cars, and my compressor has busted recently :( all systems go at the mo though ive got a mates compressor for a while :D

completed the fresh dash - needed swapping out for a good one courtesy of handsome dan, needed a headunit fitted, a choke cable sorted out, climate control (hahahaha) panel fixed, guages installed (stock ones, and a clock!)

got some new cables (handbrake, throttle etc etc)

pulled out the front valance for a little work, thats half done since i found that i think i lose motivation if im working on a few things at once

fixed the bit on the chassis, from rusted out and busted tapped holes and filthy to fresh and solid steel in there :D

visited the coolest wrecker ive ever been to :D was an adventure!

picked up a bench - funnily enough, found a rare 84 deo bench that fit nice, modded rails, cut all the rust out of it and got it all nice, then found someone in vic with a factory one he wanted to sell :\ yet to trim it but that wont be far away

welded in some more fresh sheet for the cab, compressor was holding that back but tomoz ill get into it

welded up all the holes (lots) in the front bumper so now its smooth again

knocked up two of the 4 cab mounts ive gotta make, ready to weld in

visited a bloke with a couple 620's, had a peek at a V8 one he built! was cooool. picked up an earlier front grille (winnnnnnnnn) and a spare stockie cos mine was missing from under the tub

i couldnt find anyone that made cab mount bushes (like at all, not just for datsun utes :() so ive started work on makin em myself. ive used some stock i had floating around and made a mould to suit one of the bushes, and tonight had a go at pouring urethane (shore 85A which is pretty hard, ill get softer stuff for the ones ill use in the ute). i think the stuff ive got is spoiled though thanks to a busted lid on one of the tubs of the stuff :( ill find out in about an hour if i can at least demould :D wondering what colour i should make the other ones, im thinking greeeen

so still gettin progress in, just gotta try avoid distractions :( i made an intake for my celsior yesterday while compressor was busted... sounds incredible! made the trip into toorak this morning mad fun, annoying mazza owners with the noise hah

_________________
1972 P510
1979 620


Top
   
 Post subject: Re: sixtwenty daily
PostPosted: Mon Sep 06, 2010 12:36 am 
Offline
User avatar

Joined: Fri Oct 13, 2006 4:06 pm
Posts: 314
Location: Western Suburbs, Victoriaaaaaaa
this last month hasnt been too bad progress wise

kept trying with the compressor - thats taken a week or so :( still not playing the game. pretty sure its a combination of issues with the pulleys, and the housing for the motor might be warped, that or the mainshaft is bent. either way its shelved and ive been using a mates compressor instead

finished cleaning up the front bumper, just need to weld its brackets on right so its straight

finished all the replacement cab mounts, various pics below;
[ img ]
[ img ]
[ img ]
[ img ]
[ img ]
[ img ]
[ img ]
[ img ]
[ img ]
[ img ]
[ img ]
[ img ]
[ img ]
[ img ]
[ img ]
[ img ]

cut quite a lot of sections out of the floor of the cab, cut out most of the sills and repaired bits here and there, ive patched it back together so it looks alright now, also deadened any steel that was bare underneath. a couple various shots of progress below, sorry theyre not in order
[ img ]
[ img ]
[ img ]
[ img ]
[ img ]
[ img ]
[ img ]
[ img ]
[ img ]
[ img ]
[ img ]
[ img ]
[ img ]

i got some carpet from knox, yet to be trimmed and fitted cos im waiting till i POR15 the floor. but looks and feels nice
[ img ]

i revised the design of my moulds for the cab bushes and made another 5 moulds, got some more urethane and some colour and made a half set as a test. worked nicely :D the mixes were a bit weird cos i did individual batches per bush, ive since been making half a set from a single batch and theyve come out a lot nicer. in the last couple days ive made a temporary set (from 85A that i had, which is nearly as solid as plastic) so i could mount the cab
[ img ]
[ img ]
[ img ]
[ img ]
[ img ]

i previously bought a set of various cables, ive fitted the front bit for the handbrake while the cab was off, and replaced the front section of the tailshaft with one that had a better bearing carrier, i got the fuel tank mounted good, and cleaned various bits here and there

finally got the cab fixed enough for it to go back on, so i then set about getting it back on proper. messed around a bit with bolts that centered in the holes on the chassis for the cab, and lined them up with the guide holes i had in the mounts on the cab using coathanger wire, they all lined up good :D so drilled the guides out to 12mm, used my temp set of bushes and bolted the cab down nice to find it lines up great. bulletside line matches the tub, and the gap between tub and cab is even. looks like a ute again :D ive already forgotten how long it is
[ img ]
[ img ]
[ img ]
[ img ]
[ img ]
[ img ]
[ img ]
[ img ]

feels awesome to have the whole shebang good and solid once more

thats what im up to so far, i still need to weld in fresh sills but theyre ready to go i just need to drill them, then ill POR15 the floor then set about putting the interior back together so it looks more like a thing one could actually drive. still needs lots of little things but the biggest thing is over with now so progress will be fast :D fkn itching to get it moving again now!

_________________
1972 P510
1979 620


Top
   
 Post subject: Re: sixtwenty daily
PostPosted: Mon Nov 15, 2010 12:40 am 
Offline
User avatar

Joined: Fri Oct 13, 2006 4:06 pm
Posts: 314
Location: Western Suburbs, Victoriaaaaaaa
well, still goin at it

since last posted (been a while :\) ive;

made headlight rings cos most of the tabs from old ones broke

cut out the battery tray, replacing it with a dry cell battery ive got that ill mount under the tub soon

trimmed the sills, got them in and welded, ive bogged a little of the ends since, so its a touch smoother. need to finish then paint em

then got to trimming various bits of the interior, started by trying with my current sewing machine which wasnt up to the job so i bought a pfaff 463, tore it down and rebuilt the bench, serviced it, got some appropriate bits for it then got it running nice, got some vinyl and foam and retrimmed the KB deo bench i picked up earlier. was a fair rough job but suits me just fine :D

also trimmed the door trims that i remade from steel, yet to get them on

painted the cab floor with some POR15 i got locally

started then finished fitting the carpet, rough job but looks nice and makes inside a nicer place to be which is a plus i spose heh

refitted the steering column, box and links

refitted the fresh dash

refitted the heater, ran new lines using those hosey bendy things, see how they go i spose

remade the firewall deadener panel thing

cleaned up the brake master

made a good set of cab bushes finally (60A seems pretty good, still pretty hard but 40A seems too soft)

worked a little on the doors, scraped out a lot of the rust to find the door was nearly scrapped in a stack, so ill replace sometime later. cleaned it up a bit then painted it, fixed the quarter windows and gave the lot a good clean

made the new radiator fit, then made a basic shroud to suit the thermo i had on previously. i cut away at the existing shroud to fit the radiator closer forward, so now the thermo sits behind the radiator like normal, and doesnt foul the waterpump pulley now

welded up the badge holes in the front quarters

also cut back some of the paint to see how matte white would look. pretty happy, so ill do the rest later

i took the tub off again the other day so i could work on various bits underneath (and keep it off for RWC)

this weekend worked on the getting the fresh diff center in (better ratio thanks to dan :D) and put in the other leaf bushes, and removed the old seized handbrake cables and fitted the new ones i bought

getting there :D

_________________
1972 P510
1979 620


Top
   
 Post subject: Re: sixtwenty daily
PostPosted: Wed May 18, 2011 1:45 am 
Offline
User avatar

Joined: Fri Oct 13, 2006 4:06 pm
Posts: 314
Location: Western Suburbs, Victoriaaaaaaa
ive been tearin progress :D since last post;

made temp wheel guards, taillight mount, fuel tank cover and filler mount

sorted out door locks and shaved passenger side lock

worked on the insides of the doors, aligned doors nice (ish :D)

little more rust patching, i got the front end looking better

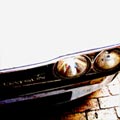
shaved the front indicator/park lights from the front valance, smoothed it up and painted it

worked on the cowl and painted it, also remade the little baffle thing underneath the cowl

fitted the fresh door trims with bolts

fitted fresh door seals (werent bad)

made radiator reducer to suit new radiator outlet

turned a few little bits, door lock knob and trim

made door handles

i sound deadened underneath the cowl and inside the wheel arches

fitted fresh door window seals (fair sh*t quality but im over it hah)

made a battery box to relocate it under the tub, bought a drycell and wired it in

repaired and bogged and painted the front quarters

painted and cleaned up the new front grille, ended up cable tying the trim rights (dont want em falling off :D)

repaired (kinda) front bumper, welded up all the holes then welded the brackets to it then refitted it

made kick panels, fitted some new 6" speakers (will trim it in vinyl when i get around to it, they look a bit rough at mo)

messed about with wiring trying to remove the volt reg since ive fitted an SR alternator with internal reg, manage to figure it out in the end. tried tidying wiring a little, still messy but its better hah

finished the sills

made a bracket for the radio antenna since i shaved the exterior one, ive got it in the cab and it works ok

made some fresh step facia panels out of some aluminium

painted the rearview mirror black, and found a 200B black steering wheel to suit interior :D

fixed the bonnet latch which was a bit sticky, also painted wipers and refitted em

fixed rear hubs, got the handbrake working too

made a new airbox

got the J alive again, sorted out timing after some messing around

welded a few exhaust hangers

fixed blinkers and hazard lights

fitted a new temp sensor and guage

sorted out a fresh thermostat, i managed to figure out they're actually quite useful things lol

aligned headlights

made a braket for a rad overflow bottle (got one from one of my N13's)

got a new windscreen and seal, removed rust while it was out and gave it a quick paint

made a front numberplate holder ready for rego

then went for RWC, and failed but with just 7 little things to fix :D which was alll winnnn;

fixed wiper jets

fitted urethane castor, swaybar link, and d bushes

fixed an exhaust leak and a mount that was busted

turned a new window winder knob since i broke mine :(

fitted a new interior light and got it working good (pulled it from a ford ranger)

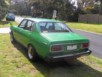
RWC passed, full rego bought and now its all mine and legally tearin up the roads!

since then ive got the tub up ready for some work, now i'm working on an L20B ive got. just waiting to see what a leakdown test will tell me about it, if its good it's getting some seals, a clutch, leads and whatever else it needs to get it in and running :D cant wait. with tub on ill be able to lower it too which ive been itching to do

ive done a fair lot more in between, ratsun thread has a lot more detail and pics

now its looking a little like this;
[ img ]
[ img ]
[ img ]

project is practically successful, now im just onto things i actually want to do rather than stuff i had to do for RWC. the fun really begins :D ...14 months on since starting the project :(

_________________
1972 P510
1979 620


Top
   
 Post subject: Re: sixtwenty daily
PostPosted: Wed May 18, 2011 12:36 pm 
Offline

Joined: Tue May 03, 2011 11:25 am
Posts: 2
mate after some front brake adjusters for my 620--got any clues
in australia


Top
   
 Post subject: Re: sixtwenty daily
PostPosted: Thu May 19, 2011 5:00 pm 
Offline
User avatar

Joined: Fri Oct 13, 2006 4:06 pm
Posts: 314
Location: Western Suburbs, Victoriaaaaaaa
tried bursons/repco?

ill have a peek at mine see if they're ok, you need the hub shoe adjusters for the fronts you? i think theyre self adjusting ones?

_________________
1972 P510
1979 620


Top
   
 Post subject: Re: sixtwenty daily
PostPosted: Mon Sep 12, 2011 1:19 am 
Offline
User avatar

Joined: Fri Oct 13, 2006 4:06 pm
Posts: 314
Location: Western Suburbs, Victoriaaaaaaa
progress has been good, since last post ive got the tub back on (still needs repair though), ive lowered it with dearched springs and 2" blocks and wound the torsion bars down, then pulled it off the road again for an L20 swap

initially i wanted most of it done in a week cos one of my other cars was running out of rego, so in that time i rushed through mounting the engine. im not entirely sure why, but ive had to drop the L lower than USDM/JDM 620's. the trans was close to the tunnel but the engine wasnt sitting even when i had it about as high as ive seen in pics of 620's/720's. this meant completely custom engine mounts, and i just modified the stock gearbox mount to suit. also got the front section of the tailshaft shortened to suit and balanced. i was using a sump from a 510 which was quite a bit deeper than sumps used for pickups, which meant it fouled the steering link and the chassis support between the wheels. so in the end i modified the existing sump to suit, and modified the pickup, then flipped the steering link by drilling out the holes and making sleeves with an internal taper to suit the tierod ends. might have just needed the trans tunnel modified but i just finished painted and repairing it :( my choice of transmission didnt help either i think - a long bluebird 5speed. i then started the exhaust, then realised the conversion wont be completed for some time yet, so i sorted out my other car, then kept working at the ute

so basically ive:
got the L20 apart, replaced front and rear mains, cleaned up then painted the block, cleaned up and sealed some minor hack jobs on the block, replaced timing chain guides, and regasketed most of the outside of the engine, then got it back together

cleaned up and machined flywheel, got a fresh clutch kit for it (used the wrong carrier at first, but got onto it afterward :(), installed it, then fitted 5speed

worked on and finished the exhaust, starting with removing the cast blanks for EGR stuff by grinding them away, then continued the primaries for about another 50cm, merged it into a 2.25" section, to a single muffler then made it exit just before the rear wheel

replaced the fuel system with a fresh pump (slightly quieter than the last one), pressure regulator, more inline filters and fresh fuel hoses

upgraded the alternator to an R31 alt i got from a certain FJ20, then relocated it to the other side to clear the steering box, then made a tensioner arrangement to suit

the oil filter fouled the new engine mount :( so i got a relocation kit to suit and fitted it

i fitted a 510 radiator, which meant i had to cut a section out of the rad support and redo some of the air dam to suit. also got a slimline fan (less than 10mm clearance to the waterpump pulley :D) and made a shroud and fitted it all up

relocated my battery posts since the oil filter needed a place to go

then rewired the engine loom, the old loom was all over the place and all of the L's ancillaries were now on the other side of the engine, then made a sort of grounding kit for the engine. also got an elec dizzy and a fresh coil to suit

relocated the temp guage i had to where the column shift stuff used to be

thanks to alastair found a 620 in a wrecking yard so got a lot of little odds and ends :D interior looks much better now

messed around with the shifter and made it suit the bench, then fixed up the facia to suit, also turned a nice comfortable gearknob

then fitted an old catchcan i had lying around to deal with PCV gases

fixed and bolted up the stock carb, then tried to start the engine to find fuel flying out of the carb :( while finding a pressure reg to suit i also found out i can fit my dellortos and they should at least start and run if they were jetted for an L, so i made those fit instead of messing around with the stock carb

a mix of old progress pics but this is basically what it looks like now:
[ img ]
[ img ]
[ img ]
[ img ]
[ img ]
[ img ]

messed around with a bunch of other little things here and there, but now am pretty much done. just need to work out a return spring for the throttle linkages and ill have a go at starting it! sorta nervous, but excited :D cant wait to drive it, even untuned!

_________________
1972 P510
1979 620


Top
   
 Post subject: Re: sixtwenty daily
PostPosted: Mon Sep 12, 2011 2:42 am 
Offline
User avatar

Joined: Mon Nov 08, 2010 10:50 pm
Posts: 298
Location: Central Coast, NSW
Lovin' it. Keep up the good work man!

_________________
910 S3 Bluebird - FJ20ET, E85, IRS, 5 Speed, 4.4 LSD
910 S3 TRX - RB25DET, Coilovers, S13 Front end, Power Steering
RA23 Celica - 18RG, Twin 40mm Webers, Coilovers, rolling on SSR mesh 15x7 0s.
douglasamills wrote:
1600s arent the only datsun


Top
   
Display posts from previous:  Sort by  
Post new topic  Reply to topic  [ 64 posts ]  Go to page « 1 2 3 4 5 »

All times are UTC+11:00


Who is online

Users browsing this forum: No registered users and 0 guests


You cannot post new topics in this forum
You cannot reply to topics in this forum
You cannot edit your posts in this forum
You cannot delete your posts in this forum
You cannot post attachments in this forum

Jump to: 

Powered by phpBB® Forum Software © phpBB Limited