Ozdat Home Feature Cars Ozdat Classifieds Event Calander Links Trade Link Tech Resource Merchandise Donate Web Mail
It is currently Sun Apr 28, 2024 2:05 am

All times are UTC+11:00


Post new topic  Reply to topic  [ 70 posts ]  Go to page « 1 2 3 4 5 »
Author Message
PostPosted: Mon Nov 10, 2014 11:54 am 
Offline

Joined: Tue Mar 11, 2003 11:11 pm
Posts: 2241
You can actually replace the brushes on the external regulator if you want to be full budget conscious (ala tight ass). Just need a soldering iron and a paper clip (paper clip to hold brushes back in by inserting into small hole).

I would personally try the following steps;

1. Check your wiring, if correct, try step 2.
2. Take off Alternator and take it to an auto electricians shop, they should have a test bench they can test it for you (generally free of charge). If it's the regulator I believe it should be obvious.
3. Replace regulator, if there is another part of the alternator that is stuffed it's just not worth fixing one of those bosch units as they are a plenty. Auto elec shops will generally sell you a reg for the same price as ebay to.
4. If it is the reg, either take a punt and replace the bushes (around 5-10 bucks), or regulator ($30-40) as you have posted.

Post a picture of your brushes so we can see how warn they are, if they are almost non existent they may not even be contacting the slip ring.

Here is a link to some brushes (you need to check compatibility);

http://www.ebay.com.au.au.au/itm/12-24V ... 232dd05981

If you were doing a proper service on the alternator, you would disassemble, and depending on the condition of the slip ring on the shaft, either linish it or give it a very light machine on the lathe. Do the bearings to if they aren't great, then re-assemble.

If you want an adventure, replace the slip ring completely -> http://www.ebay.com.au.au.au/itm/Slip-R ... 41738bc97c


Top
   
PostPosted: Mon Nov 10, 2014 1:19 pm 
Offline
User avatar

Joined: Fri Sep 24, 2004 1:54 pm
Posts: 1718
Location: Melbourne, VIC
I'll take some pics of the brushes tonight. I had it bench tested ages ago, but I can't remember what the outcome was, but I don't think they thought there was much wrong with it which I thought was strange. I just rang a local auto elec and they said it was best to test it in the car, which I've already had done by my mechanics.

I think a full rebuild of the alt is a bit out of my league, I'm having bad flashbacks to the time I pulled my wiper motor apart :thatdbeme:

My thinking at the moment is this:

1. Check condition of bushes
2. If worn, replace with new regulator (don't trust my soldering enough, would rather bolt in a whole unit)
3. If still charging low, consider retrofitting RB30 alternator, which would mean wiring in the regulator plug

_________________
build-threads.com


Top
   
PostPosted: Mon Nov 10, 2014 2:10 pm 
Offline
Donating Member
Donating Member
User avatar

Joined: Sun Mar 09, 2003 8:11 pm
Posts: 2121
Location: South Adelaide
nick wrote:
Does this thread help your wiring questions?
http://ozdat.com/forum/viewtopic.php?f= ... 9&start=15
Anth510 wrote:
Hmm not really. The image at the bottom of page two confirms the differences, where the capacitor goes from D- to D+, whereas my current one goes from ground to B+. But from what I've read the capacitors are apparently just to reduce radio interference.

This info should help you see if your wiring is similar:

"The main (thick) positive cable goes to the 'B+' terminal nut lug.
The main (thick) negative/earth cable goes to the 'D-' bolt which also holds the body of the capacitor.
The capacitor cable plugs onto the 'D+' spade lug.
The brush pack 'L' terminal goes out to the charge light on the dash (small white cable with red stripe on a Datsun1600).
The brush pack 'S' terminal goes directly to the battery +'ve (but I just connected it to the B+ terminal as my battery is in the boot)."


DATO4 wrote:
Also, does your alternator have an exciter circuit? Bosch alternators generally require a 3-4 watt globe to excite the unit. This may help your previous charge problem?
I have two ewp's and the thermos in my car, your alternator should run the thermo and ewp no worries.
Anth510 wrote:
I have no idea about the exciter circuit, how would I check for that? Yeah I've heard the EWPs take stuff-all power to run, so somethings up.
This exciter cct is the charge light on the dash thats connected to the L terminal.

I found a great explanantion of it:

"The Bosch alternator is incapable of self-excitation, or "boot-strapping" itself to an operating condition. Older DC generators and some U.S. alternators have residual magnetism retained in the core, or some other scheme to get enough field current to get themselves up and running. The Bosch alternator uses a different scheme. The charge warning lamp is connected between the ignition switch and the D+ terminal. When the car is first started, there is no output from the alternator at either the B+ or D+ terminals. The voltage regulator, sensing no output, is attempting to command maximum field current... it effectively shorts the D+ and DF terminals together. This places the D+ terminal close to ground potential, because the resistance of the field winding is not large. This means that there is +12 volts on one side of the charge warning lamp, and the other side of the lamp is grounded through the alternator field winding. Current thus flows through the lamp, lighting it. This same current, however, also flows through the alternator field winding, producing a magnetic field. This magnetic field is what the alternator needs to start up, and if everything is working correctly, that's exactly what happens. The alternator now begins to develop identical voltages at the D+ and B+ terminals. The D+ terminal is connected to one end of the charge warning lamp, while the other end of the lamp is connected to the battery via the ignition switch. Since the B+ terminal is hard-wired to the battery, and since both the D+ and B+ diodes are fed from the same set of windings in the alternator, no voltage difference can exist between these two points. The warning lamp goes out.
The voltage regulator "watches" the voltage at the D+ point, which should be the same as that applied to the battery. It now changes the short between the D+ and DF terminals into a variable resistance. This effectively controls the field current (whose source is now the output from the D+ terminal, and not the charge warning lamp) and thus regulates the output voltage of the alternator."
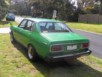

Top
   
PostPosted: Mon Nov 10, 2014 2:31 pm 
Offline
User avatar

Joined: Fri Sep 24, 2004 1:54 pm
Posts: 1718
Location: Melbourne, VIC
nick wrote:
nick wrote:
This info should help you see if your wiring is similar:

"The main (thick) positive cable goes to the 'B+' terminal nut lug.
The main (thick) negative/earth cable goes to the 'D-' bolt which also holds the body of the capacitor.
The capacitor cable plugs onto the 'D+' spade lug.
The brush pack 'L' terminal goes out to the charge light on the dash (small white cable with red stripe on a Datsun1600).
The brush pack 'S' terminal goes directly to the battery +'ve (but I just connected it to the B+ terminal as my battery is in the boot)."
That's my concern, as my current setup doesn't have any terminals on the brush pack, and my D+ spade has a wire attached to it which goes back into my loom. So if I am to run the RB30 alternator, I'm going to have to change some wiring, which I didn't realise at first. I hope I'm not making everyone go round in circles here haha

Is there any way I can test if that white wire with red space currently on D+ is for the charge light? If I know it's that for sure, then I could confidently wire it into the brush pack L terminal. If I can connect 'S' to B+ (as my battery is also in the boot) that would be pretty easy.

But again, this is only if replacing the regulator/brushes on my current alternator doesn't solve the issue.

_________________
build-threads.com


Top
   
PostPosted: Mon Nov 10, 2014 2:45 pm 
Offline
User avatar

Joined: Fri Sep 24, 2004 1:54 pm
Posts: 1718
Location: Melbourne, VIC
On a related note, I'm learning a hell of a lot about alternators today! :cheers

_________________
build-threads.com


Top
   
PostPosted: Mon Nov 10, 2014 4:10 pm 
Offline

Joined: Tue Mar 11, 2003 11:11 pm
Posts: 2241
I'm glad you raised this thread as I need to finish a rebuild of my alternator for the J15, and never thought of looking for bearings on ebay before :)


Top
   
PostPosted: Mon Nov 10, 2014 4:50 pm 
Offline
Guru
User avatar

Joined: Fri Mar 07, 2003 4:58 pm
Posts: 2637
Location: Adelaide.
If you have the old ones, just take them to CBC for example and they will pull them from stock for you.
I had no trouble getting the bearings for my '65 Fairlady alternator.
One had to be ordered in but that didn't take long :)

_________________
Regards, Graeme
Just trying to help...
http://nissanman.shutterfly.com/
graemes@internode.on.net


Top
   
PostPosted: Mon Nov 10, 2014 6:04 pm 
Offline
User avatar

Joined: Tue Jun 02, 2009 9:48 pm
Posts: 797
Location: over crowded Sydney
of course! thank you for reigniting the stuff i learnt in tafe! And a pet hate is a scratchy triple j frequency

Anth, i'm buying a reco'd RB30 alternator off ebay and planning to do same install (for added thermo's and ewp's) see link. Apparently it's upgraded :blahblah:

http://www.ebay.com.au.au/itm/131239178 ... 1423.l2649

i'll let you know how i go. keep the post updated :thumbsup:

_________________
1600 with FJ20 & Simmons. something different.


Top
   
PostPosted: Mon Nov 10, 2014 6:17 pm 
Offline
Donating Member
Donating Member
User avatar

Joined: Wed Dec 05, 2007 2:21 pm
Posts: 3242
Location: Zermatt, Switzerland.
Anth, this is the best photo I can find from when I did this on my FJ20. Possibly the best this I ever did, all of a sudden my headlights worked!

[ img ]

Now there is a plug that plugs in on the back of the alternator (pictured), the wire you can see with the terminal on it I just looped straight back to the B+ terminal on the alternator. The other one I joined up to the exciter wire that goes up to the dash light. Mine had an earth, which I earthed. Then from B+ I ran a nice fat wire back to the battery and everything worked fine!
DATO4 wrote:
a pet hate is a triple j
Couldn't have put it better myself, I'd rather listen to distortion or Nova!

_________________
green200b - aka Alistair

The fleet:

Australia:
'80 200B GX - the green200b - hibernating
'81 RX-7 - 12A extend port - daily
'74 RX-2 - 13B bridgeport - cruiser

Europe:
'93 200SX - CA18DET - tourer
Dato200B wrote:
Green200B has forgotten more about 200Bs than we will ever know.


Top
   
PostPosted: Mon Nov 10, 2014 6:34 pm 
Offline
User avatar

Joined: Tue Jun 02, 2009 9:48 pm
Posts: 797
Location: over crowded Sydney
are you kidding?! i think you read it wrong!

I'd rather listen to a bottom end knock than kyle sandilands and the same 20 songs, 40 times a day! crank up taylor swift in your 200b mate!

_________________
1600 with FJ20 & Simmons. something different.


Top
   
PostPosted: Mon Nov 10, 2014 6:55 pm 
Offline
User avatar

Joined: Fri Sep 24, 2004 1:54 pm
Posts: 1718
Location: Melbourne, VIC
Okay so I just got out of the shed. First of all I measured the RB30 alternator for DATO4...
Attachment:
[ attachment ]
Photo-10-11-14-5-24-54-PM.jpg [ 118.13 KiB | Viewed 4734 times ]
Definitely 65mm spacing for the regulator (excuse the blurry pic)
Attachment:
[ attachment ]
Photo-10-11-14-5-23-08-PM.jpg [ 164.86 KiB | Viewed 4734 times ]
Thought I'd measure the spacing between the mounts, just in case someone visits this thread in the future, might find it useful. Remember there's a shim in one of the holes that can be moved in and out a few mm.
Attachment:
[ attachment ]
Photo-10-11-14-5-35-04-PM.jpg [ 103.88 KiB | Viewed 4734 times ]
Here's the brushes on the RB30 alternator, longest point is about 10mm from the base.
Attachment:
[ attachment ]
Photo-10-11-14-5-34-05-PM.jpg [ 119.9 KiB | Viewed 4734 times ]
Here's the brushes on my FJ20 alternator. Again, about 10mm at the longest point.

Gave them a quick wipe with some prepsol and screwed it back together, then jumped in the car.
Attachment:
[ attachment ]
Photo-10-11-14-5-56-25-PM.jpg [ 143.51 KiB | Viewed 4734 times ]
I have OIL and IGN lights, so I'm assuming the excite wire goes to the IGN light? Or am I way off?
Attachment:
[ attachment ]
Photo 10-11-14 5 57 17 PM.jpg [ 201.92 KiB | Viewed 4734 times ]
13v is my idle

_________________
build-threads.com


Top
   
PostPosted: Mon Nov 10, 2014 6:56 pm 
Offline
User avatar

Joined: Fri Sep 24, 2004 1:54 pm
Posts: 1718
Location: Melbourne, VIC
Attachment:
[ attachment ]
Photo 10-11-14 6 01 13 PM.jpg [ 219.38 KiB | Viewed 4734 times ]
And this is with high beams on. Goes lower with the thermo on, but didn't have time to let the car sit that long.

One thing to note is that when I put the high beams on, the alternator makes a feint whirring sound, you can hear that it's working harder under that load. Not sure if that is a sign of something?

_________________
build-threads.com


Top
   
PostPosted: Mon Nov 10, 2014 7:19 pm 
Offline
Guru
User avatar

Joined: Fri Mar 07, 2003 4:58 pm
Posts: 2637
Location: Adelaide.
Those voltages look OK to me.
Yes, the IGN light is the equivalent of a CHarGe or ALTernator light.
The noise may be bearing noise when the alternator gets a load applied.
The advantage of an ammeter is that you can see the output dip and rise again as the Voltage Regulator compensates for any additional load.
Once you see how it works, it is then easy to see when it's not working properly.

I would take it to a workshop and get it checked over, it may be tired.

_________________
Regards, Graeme
Just trying to help...
http://nissanman.shutterfly.com/
graemes@internode.on.net


Top
   
PostPosted: Mon Nov 10, 2014 8:28 pm 
Offline
User avatar

Joined: Fri Sep 24, 2004 1:54 pm
Posts: 1718
Location: Melbourne, VIC
I thought 12.5 was way to low? Everything I read keeps saying it should be around 14 and not drop when accessories are turned on.

Well if it's reading low and the bearing is going, maybe I am better off wiring the RB30 unit in. Going back over the posts I'm fairly confident of how to wire it in, now.

When you say get it tested, Graeme, do you mean bench tested or take the car somewhere?

_________________
build-threads.com


Top
   
PostPosted: Mon Nov 10, 2014 8:46 pm 
Offline
Guru
User avatar

Joined: Fri Mar 07, 2003 4:58 pm
Posts: 2637
Location: Adelaide.
I would get it bench tested.
Be careful fitting a higher output alternator.
You need to ensure that the existing wiring rating is not exceeded or there will be fire and flame.
Additional loads need to have their own wiring and relay to avoid overloading the factory loom.
For example, if the OEM alternator in your year 510 was a 22Amp jobby, then all the associated wiring should be protected with a 25A breaker or maxi fuse.
Don't use a fuseable link, there is much better technology available nowadays.
The new alternator has the ability to output 70Amp and it won't care what wire gets it :shock:
Additional wiring for EWP, audio, whatever, needs to protected with additional fusing.

DON'T OVERLOAD ANY WIRING!

I have a thing about alternator upgrades to old cars with lack of adequate protection :roll:

I have also got a schematic which shows how to add extra wiring for auxiliary items without risking damage to the existing wiring if you want a copy :idea:

_________________
Regards, Graeme
Just trying to help...
http://nissanman.shutterfly.com/
graemes@internode.on.net


Top
   
Display posts from previous:  Sort by  
Post new topic  Reply to topic  [ 70 posts ]  Go to page « 1 2 3 4 5 »

All times are UTC+11:00


Who is online

Users browsing this forum: No registered users and 6 guests


You cannot post new topics in this forum
You cannot reply to topics in this forum
You cannot edit your posts in this forum
You cannot delete your posts in this forum
You cannot post attachments in this forum

Jump to: 

Powered by phpBB® Forum Software © phpBB Limited