I am interested in making a front spoiler similar to some of the under 2 litre sports sedans or similar to Damiens (Styx16), but a little more rounded and tweaked with the ability of having a splitter/undertray and a hole in the front for an oil cooler/ducting.
Curious to know why you want to make a chin spoiler when there are a few different designs out there, unless you want to tweak it as well?
My construction method would be similar, but potentially different as I have an existing spoiler I will use as the base.
1. Buy a shape that is similar or make a base shape that is similar out of wood/foam etc.
2. Shape your material to suit.
I will be cutting sections out and using a combination of metal/wood and body filler with expandable foam to get the shapes I want.
3. After this you will have to coat your 'template' in gel coat paint because you will be coating it in fibreglass to make your 'buck'.
3.5 This is now your 'template'.
4. Apply fibreglass matt or 'roavings' and the associated recommended resin (i'm really going to skip over this bit as it's pretty detailed). Complete a number of layers. This process creates the 'buck'. You will have to put reinforcement on the outside so it comes off in one piece and keeps strength. Make sure you have suitable 'draft' on your template, so you can remove the 'buck' off the template. Some people also 'glass in' air or water fittings into the buck so they can blow the template (and later the parts you make) off the buck.
5. Let it set.
6. Remove your fibre-glass buck off the template. Fix with body filler all the air holes and crap that didn't work. Sand and smooth
7. Paint over with appropriate gel coat.
8. Your 'buck' is now ready.
8. Apply fibreglass matt/roavings onto the buck with appropriate resin. Multiple layers will be needed.
9. Let it set.
10. Trim excess off
11. Blow it off (gently remove it) using the previously fitted air/water fittings.
12. This is your fibre-glass part!
OR:
1. Go to Topstage composites (
http://www.topstage.com) with a sketch of what you want, your car and get them to make it...
_________________
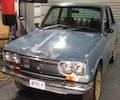
1972 Datsun 1600, S14 SR20DET Engineered (204rwkW @ 17psi.)
viewtopic.php?t=6579
#SR20Datsun @SR20Datsun